
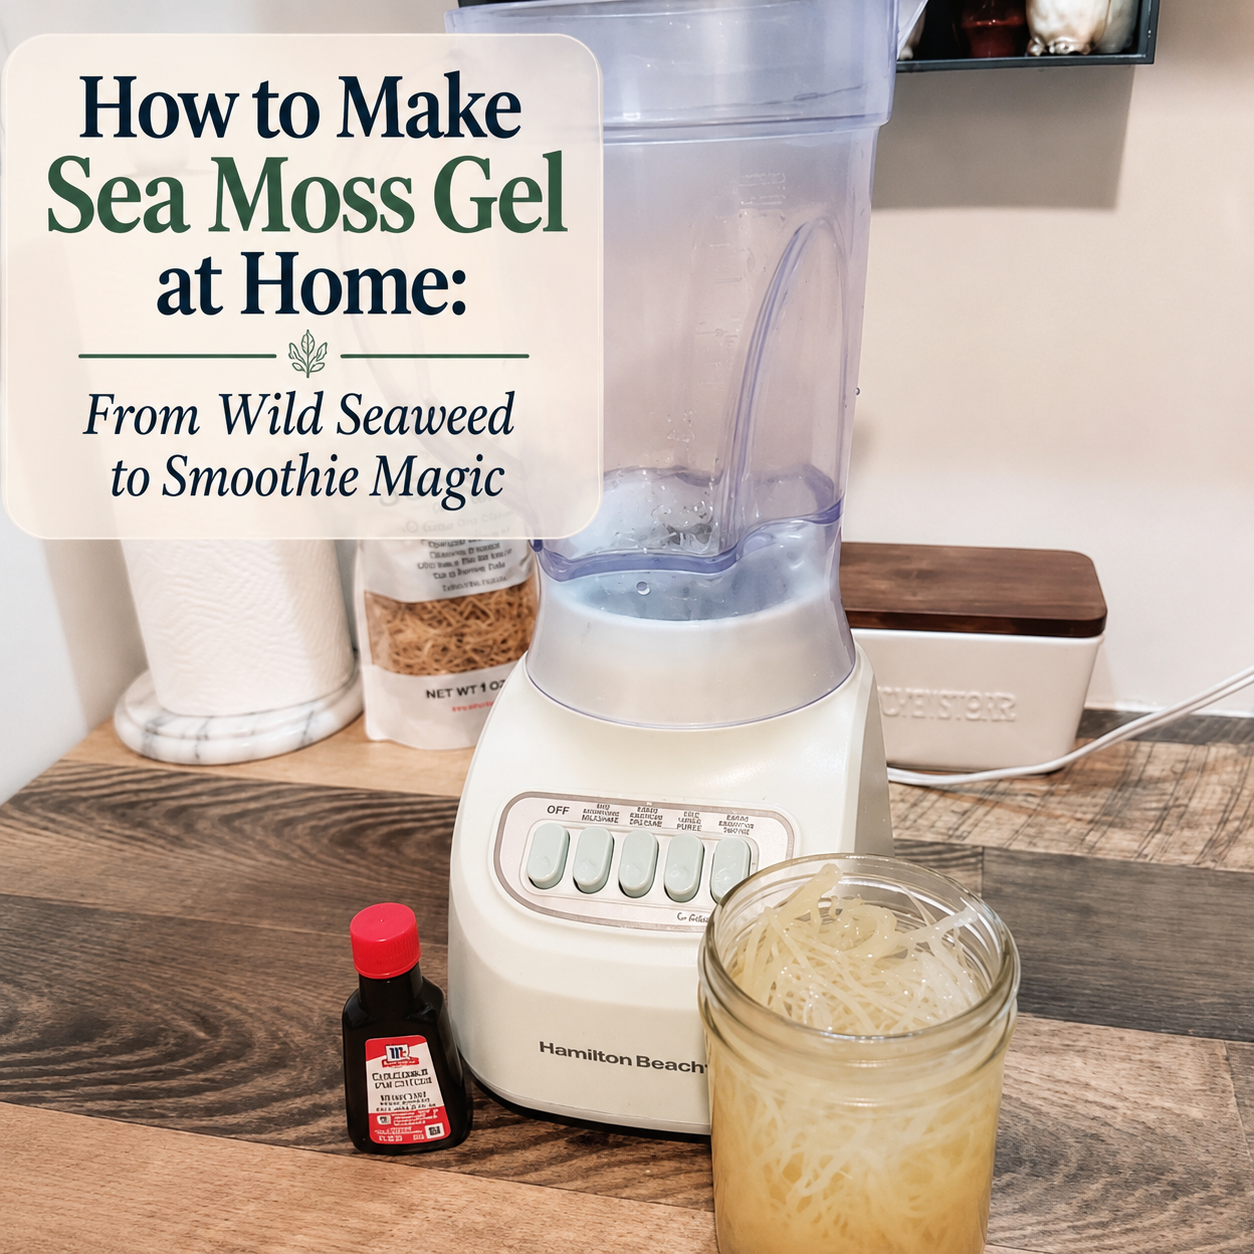
Sea moss is one of those wellness foods that somehow manages to be both genuinely interesting and wildly over hyped at the same time. Spend five minutes scrolling through social media and you will probably run into someone claiming it contains nearly every mineral your body could ever need, fixes digestion, boosts energy, clears your skin, strengthens your immune system, improves your mood, and possibly reorganizes your entire life before breakfast.
The truth is a little less dramatic, but honestly, that does not make sea moss any less interesting.
Sea moss is an edible red seaweed that has been used in food for generations. When dried sea moss is cleaned, soaked, and blended with water, its naturally occurring gel-like compounds create a thick, smooth mixture that can be stirred into smoothies, oatmeal sauces, drinks, and other foods. It is simple, practical, and surprisingly easy to make at home once you understand what the process is actually doing.
I personally like adding sea moss gel to my morning smoothies because it disappears easily into fruit and greens without over taking the flavor. It is one of those things that can become part of a routine without requiring a complicated “wellness ritual” or a kitchen counter covered in fifteen different powders.
And despite how complicated some people make it sound, making sea moss gel at home really comes down to three basic things: clean it well, let it hydrate fully, and do not drown it in water when you blend it.
What Is Sea Moss, Exactly?

Sea moss is a common name used for several types of edible red algae. One of the best-known varieties is Irish Moss, traditionally known as Chondrus crispus. Like other sea vegetables, it naturally contains fiber, carbohydrates, minerals, and plant compounds that vary depending on where and how it grows.
One of the reasons Irish moss has been used in food for so long is because it contains natural polysaccharides, including carrageenan-type compounds, that absorb water and create a thickening effect. That is what gives sea moss its ability to transform from dry, wiry strands into a smooth gel once it is properly hydrated and blended.
So no, the transformation is not some mysterious internet wellness magic. It is simply chemistry doing what chemistry does.
Sea moss can also contain iodine, which is one of the reasons it gets so much attention nutritionally. However, iodine levels in seaweed can vary quite a but depending on the species, harvest location, growing conditions, season, and processing method. That means homemade sea moss gel is not something I would treat like a perfectly measured vitamin supplement. I look at it more as a whole-food addition to my diet, not something where more automatically means better.
What You Need to Make Sea Moss Gel
You do not need anything fancy to make sea moss gel at home. A basic setup works perfectly well.
You will need:
- Dried whole Irish Sea moss
- Clean drinking water
- A colander
- A large bowl
- A blender
- A clean glass jar with a lid
Filtered or bottled water is a great option for soaking and blending, especially if you prefer the taste or quality of it, but you do not need to buy expensive alkaline water for it just because someone online says you do. If your tap water is safe to drink, it is perfectly fine for the initial rinsing stage. The most important thing is that the water you use for soaking and blending is clean and suitable for drinking.
Step One: Rinse the Sea Moss Thoroughly

This is probably the most important part of the entire process, especially if you are working with wild-crafted or minimally processed sea moss.
Sea moss comes from the ocean. That means it may still carry salt, sand, tiny bits of natural debris, or residue trapped between its many little branches. It is not something you want to pull directly from the bag and toss into a blender without cleaning it first.
I like to place the sea moss into a colander and rinse under cool water while gently separating the strands with my fingers. I use a colander with a bowl attachment, which is rather helpful. As the sea moss is in the colander, I am able to fill the bowl with water and let the sea moss sit for a few seconds at a time, swish the sea moss around, lift the colander, dump the water, and repeat the process several times.

This method works well because you can actually see what is coming off the sea moss instead of just hoping the running water is doing the job.
Keep rinsing until the water looks clean and you are no longer seeing obvious grit, sand, salt buildup, or debris. The sea moss itself may begin to soften slightly during this process, which is completely normal.
If you plan to use some of the soaking water later when you blend the gel, this initial rinsing becomes even more important. You want that soaking water to stay as clean as possible so you are not blending leftover grit or ocean debris into your finished gel.
In other words, take your time with the rinsing. Your blender may be powerful, but it cannot turn sand into nutrition.
Step Two: Soak the Sea Moss

Once the sea moss is thoroughly cleaned, transfer it to a clean jar or container and cover it generously with fresh drinking water. The dried moss will expand quite a bit, so do not pack the container or jar tightly or fill it completely to the top. It needs space to swell and soften.
I prefer soaking sea moss in the refrigerator, especially when it is going to sit in water for many hours. Hydrated seaweed is a moist food and refrigeration gives you better temperature control during the soaking process.
A soak around 12 to 24 hours is usually enough for most dried sea moss, although the exact time can vary depending on the thickness and dryness of the strands.

Instead of obsessing over the clock, pay attention to the texture.
Properly hydrated sea moss should become noticeably larger, softer, more flexible, slightly slippery, and more translucent. The thicker pieces may still have a little firmness to them, and that is fine. You are not waiting for it to become mushy or feel like overcooked spaghetti.
The goal is simply for it to be soft enough to bend easily and blend smoothly.
If the sea moss expands so much that some strands begin sitting above the waterline, add a little more clean water so everything remains submerged.
Should You Keep the Soaking Water?
This is one of those subjects that somehow turns into a full-blown debate online.
Some people insist the soaking water must always be discarded, while others believe every drop should be used because nutrients from sea moss move into the water during soaking.
I did extensive research and the reality is much more balanced.
As sea moss hydrates, some water-soluble compounds can move into the surrounding water. The sea moss itself, however, still contains the majority of what you are actually eating when you make the gel.
If the water looks dirty, contains grit, has visible debris, or develops an unpleasant odor, discard it and use fresh drinking water instead. You are not throwing away the benefits of the sea moss by changing the water. The hydrated moss itself is still the main ingredient.
The important part is using clean water and trusting your senses.
Step Three: Blend the Sea Moss

Once the sea moss is fully hydrated, remove it from the soaking container and transfer it to your blender.
You can use a fork, spoon, or clean tongs to lift it out. If you plan to use the soaking water, leave it nearby, rather than pouring the entire jar into the blender at once.
This is where it is very easy to make the gel too thin.
Start with a smaller amount of water than you think you will need. Blend the hydrated moss until it begins to break down, then add more water little by little if the blender is struggling or the mixture seems too thick.

The goal is a smooth, creamy consistency with no recognizable pieces of sea moss remaining.
Freshly blended sea moss can look thinner than you expect, and that is completely normal. It continues to thicken as it chills.
This is why I strongly recommend resisting the urge to keep adding water just because it does not look like finished gel immediately.
You can always thin a gel later if it is too thick. Trying to rescue sea moss soup is a little more annoying.
Step 4: Refrigerate and Let It Set

Once the sea moss is completely smooth, pour it into a clean glass jar, cover it, and place it in the refrigerator.
As it chills, the natural gel-forming compounds continue to set, and the texture becomes noticeably thicker and more spoonable.
Give it several hours before deciding whether the consistency is right.
Freshly blended sea moss and fully chilled sea moss can look very different, so do not judge the final texture too quickly.
Once set, the gel should be smooth, soft, and easy to scoop with a spoon. It should not be watery, chunky, or stiff like gelatin.

If your first batch ends up slightly thicker than you prefer, you can always blend a small amount of water into it later. If it ends up thinner, simply use less water the next time you make it.
That is really part of the process. Once you make it a few times, you quickly figure out the exact texture you like.
Can Sea Moss Gel Be Flavored?
Yes, and this is where you can have a little fun with it.
Plain sea moss gel has a relatively mild flavor once it’s properly rinsed and prepared, which is one of the reasons why it works so well in smoothies. (Personally, I think it doesn’t taste like anything at all!) It blends easily into fruit, greens, yogurt, oatmeal, and other foods without taking over the entire flavor profile.
You can also flavor the gel itself if you want.
Coconut and vanilla are especially versatile because they pair well with berries, mango, pineapple, banana, peach, chocolate, and other common smoothie flavors. If you use food-grade extract, start with a very small amount because extracts are concentrated and can become overpowering quickly.
You can also blend fruit directly into a portion of the gel, but I prefer keeping most of mine plain. That way, I can change the flavor of my smoothie whenever I want without committing an entire jar to one fruit combination. But this batch I made it with coconut extract particularly for my berry smoothies.
If you do add fresh fruit directly to the gel, make smaller batches because fresh fruit can affect how long the mixture keeps in the refrigerator.
How I Use Sea Moss Gel in My Morning Routine

My favorite way to use sea moss gel, and enough liquid to blend make an easy little drink that feels fresh without turning breakfast into a full production.
Blueberries and strawberries are especially good because their flavor is strong enough to cover any mild seaweed taste. Mango and pineapple also work beautifully, especially if you prefer something sweeter and more tropical.
Blackberries are delicious too, although their seeds apparently believe they have been personally invited to live between your teeth for the rest of the morning.
I usually keep the sea moss gel itself fairly neutral and let the fruit provide most of the flavor. That makes it much easier to change things up depending on what I have in the freezer.

How Much Sea Moss Gel Should You Use?
This is one area where I would ignore the internet philosophy that more must automatically be better.
There is no perfectly standardized serving size for homemade sea moss gel because the concentration depends on how much dried sea moss and water were used to make it.
Seaweed can also contain varying amounts of iodine, so taking very large quantities simply because someone online recommends it is not necessarily a good idea.
If you are introducing sea moss into your diet, starting with a small amount and paying attention to how your body responds is a sensible approach.
Sea moss contains fiber and gel-forming carbohydrates, which means suddenly adding a large amount to your diet may cause bloating, gas, and digestive changes for some people.
I would rather start small and adjust than dump half a Mason jar into a smoothie because someone on TikTok said it would unlock my entire nervous system.
‼️ People with thyroid conditions, those taking thyroid medication, pregnant or breastfeeding individuals, and anyone who has been told to monitor iodine intake should speak with a healthcare professional before making sea moss a regular part of their diet. ‼️
The “92 Minerals” Claim
One of the most common claims surrounding sea moss is that it contains 92 of the 102 minerals the human body needs. You will see that statement everywhere. What you will not see clearly as often is strong scientific evidence confirming that exact number across all types of sea moss.
Seaweed absolutely can contain a variety of minerals and nutrients, but the exact composition depends on many factors, including species, growing conditions, harvest location, season, and processing. That means one bag of sea moss may not have the exact same mineral profile as another.
That does not mean sea moss has nothing to offer – far from it. Sea moss naturally provides fiber and a variety of minerals and plant compounds, which is part of what makes it such an interesting addition to the diet. Nutrients commonly found in sea vegetables can support normal functions involved in skin, hair, and nails, digestion, and overall nutrition, although sea moss itself should not be treating as a guaranteed beauty or health cure. One of the things I have personally noticed is that adding sea moss to my morning smoothie gives me enough extra fiber that I have been able to skip my separate fiber supplement entirely. For me, that is much more practical benefit than chasing some magic number of minerals. If something fits easily into my routine, adds nutritional variety, and helps me simplify something else I was already taking, I consider that a win.
Sea moss does not need exaggerated claims in order to be worthwhile. It can simply be what it is: an interesting edible sea vegetable that contains fiber, minerals, natural plant compounds, and useful gelling properties.
On a personal note, sea moss has given me an amazing amount of energy!
How to Store Homemade Sea Moss Gel

Homemade sea moss gel should always be stored in a clean, covered container in the refrigerator.
Use a clean spoon each time you remove some from the jar, and avoid repeatedly dipping utensils that have touched other foods into the gel.
One simple habit that makes sea moss gel much easier to manage is labeling the jar. Write down the date the gel was made, or if you like, add the flavor as well if you have more than one batch in the refrigerator. A small piece of masking tape, a removable label, or even a dry-erase marker on the lid can save you from standing in front of the fridge two weeks later trying to remember whether you made that jar last Tuesday or during a completely different phase of your life. Labeling is especially helpful if you freeze portions, because frozen gel can start to look the same once it is tucked away.
Dating the batch gives you a clear reference point and makes it much easier to rotate older gel first instead of relying on memory alone.
If you notice an unusual color, visible mold, bubbling, unexpected discoloration, or any other sign that the gel may have spoiled, throw it away.
When food is questionable, I am firmly on team “do not taste it just to see.”
If you make more gel than you can reasonably use while fresh, freezing small portions is another option. Silicone trays or small freezer-safe containers can make this easy, especially if you want pre-portioned amounts for smoothies.
Is Sea Moss Worth Making at Home?

Sea moss is a perfect example of how the wellness world can take something genuinely useful and surround it with so much hype that it becomes difficult to separate fact from fantasy.
You do not have to believe sea moss is a miracle food to appreciate it.
The cost is what hooked me. Some bags of dried sea moss can look expensive at first glance, especially compared with a bottle of capsules or a premade jar of gel, but a little dried moss goes a very long way once it is soaked and blended. One small amount can expand into an entire jar of gel, which makes the price make much more sense once you see how many servings you actually get from it.
I also like knowing exactly what is in the jar. There is something to be said for taking dried sea moss, rinsing it, soaking it, blending it, and ending up with a fresh batch that contains exactly what you put into it. Some sea moss supplements and premade products can include sweeteners, flavorings, fillers, or other added ingredients depending on the brand. That does not automatically make them bad, but if I have the option to make a fresh batch with sea moss and water and keep the ingredient list ridiculously simple, I personally prefer that.
Fresh homemade gel also gives you control over the texture, flavor, batch size, and how it fits into your routine. Between the cost per serving and the simplicity of the ingredients, making it yourself can be one of those cases where a little extra effort upfront pays off every morning afterward.
It is an edible sea vegetable with an interesting history, natural thickening properties, fiber, minerals, and a texture that makes it incredibly easy to add to smoothies and other foods.
Making it at home also give you more control over the process. You can rinse it thoroughly, choose the water you prefer, adjust consistency, keep it plain or add flavor, and use it in ways that actually fit into your routine.
For me, that means adding a spoonful to a morning smoothie and moving on with my day. No detox challenge. No giant green drink. No promise that my life is going to transform because I ate seaweed before breakfast.
Just a simple jar in the refrigerator, a little scoop in my smoothie, and another practical way to bring something from the natural world into every day life.
And sometimes, that is more than enough.
Common Sea Moss Gel Mistakes

Sea moss gel is pretty forgiving once you understand the basics, but there are a few places where things can go sideways. Most mistakes are not dramatic disasters; they usually just leave you with gritty gel, watery gel, funky-smelling gel, or a jar that somehow became the consistency of wallpaper paste.
The good news is that nearly all of them are easy to avoid.
Not Rinsing the Sea Moss Thoroughly Enough
This is probably the biggest mistake, especially when using wild-crafted or minimally processed sea moss.
Because sea moss grows in the ocean, it can hold onto salt, sand, tiny pieces of shell, and other natural debris. If you rush the rinsing stage, all of that has a chance of ending up in your finished gel.
Take your time separating the strands from several angles. Swishing the moss in a bowl of clean water between rinses can also help loosen anything trapped between the branches.
If the water is still obviously gritty or cloudy from debris, keep going.
Sea moss gel should taste mild and clean, not like you accidentally blended part of the shoreline.
Using Too Much Water When Blending
This is one of the easiest mistakes to make because freshly blended sea moss can look thinner than expected.
The temptation is to keep pouring water into the blender until it immediately looks like finished gel. Do not do that.
Sea moss thickens as it chills, so the consistency is straight out of the blender is not the final consistency. Start with a smaller amount of water, blend it smooth, and only add more if the blender truly needs it.
You can always thin thick gel later.
Trying to convince a jar of sea moss soup to become gel again is considerably less fun.
Not Giving It Enough Time to Soak
Dry sea moss needs time to fully re-hydrate before blending.
If the strands are still stiff and brittle, or hard in the center, the blender has to work much harder and you may end up with a grainier texture.
Properly soaked sea moss should be plump, flexible, soft, and slightly slippery. It can still have a little firmness, especially in thicker branches, but it should bend rather easily rather than feeling crunchy.
Instead of worrying about whether it has soaked for exactly 12, 18, or 24 hours, pay attention to the texture.
The sea moss will tell you when it is ready better than the clock will.
Soaking It Too Long at Room Temperature
A long soak is not automatically better.
Once dried sea moss is sitting in water for hours, it becomes a moist food, and moist foods deserve a little common sense when it comes to temperature.
For longer soaking periods, keeping the sea moss refrigerated is the safer option. You still get the hydration you need without leaving it sitting warm on the counter all day and night.
If you ever notice an unpleasant sour, fermented, or otherwise funky smell during soaking, do not try to convince yourself that it is “just the ocean.”
When something smells wrong, trust your nose.
Using Dirty Soaking Water
Some people like using part of the soaking water when they blend their sea moss, and that is perfectly reasonable if the boss was thoroughly cleaned beforehand and the water still looks clean.
But if you see sediment at the bottom, floating debris, grit, or anything questionable, use fresh drinking water instead.
The nutrients are not all hiding in that one jar of soaking water. The sea moss itself is still the main ingredient.
There is no prize for being emotionally attached to cloudy water.
Expecting the Gel to Be Thick Immediately
Freshly blended sea moss often looks more like a thick smoothie than a finished gel.
That does not mean you did anything wrong.
Once refrigerated, the natural gel-forming compounds continue to thicken and the texture becomes much more noticeable.
Give the finished jar several hours in the refrigerator before deciding it is too thin.
Judging sea moss gel five minutes after blending is a little like pulling a cake out halfway through baking and announcing that the recipe failed.
Give it a minute.
Making Too Much at Once
Sea moss expands considerably when soaked, which means a surprisingly small amount of dried moss can turn into a very respectable amount of gel.
It is easy to look at a handful of dried sea moss and think, “That cannot possibly be enough.”
It probably is.
Unless you are feeding an entire household of dedicated sea moss enthusiasts, smaller batches are usually easier to manage. They are easier to store, easier to use while fresh, and give you more opportunities to adjust the water ratio until you find the exact texture you prefer.
There is no need to turn an entire bag into gel just because you opened it.
Adding Too Much Flavoring
If you decide to flavor your sea moss gel with coconut, vanilla, or another food-grade extract, remember that extracts are concentrated.
A little goes a very long way.
Start with a tiny amount, blend it in, taste, and add more only if needed.
You can always strengthen the flavor.
Trying to rescue a jar of gel that tastes like you drank perfume from a coconut is a more complicated situation.
Fresh fruit can also be blended into sea moss gel, but flavored batches containing fruit may not keep as long as plain gel. Making smaller flavored portions allows you to experiment without committing the entire batch.
Assuming More Sea Moss Means More Benefits
This is probably the mistake I see most often in wellness culture in general.
Once something is labeled “healthy,” people tend to assume that consuming five times as much must make it five times healthier.
That is not how nutrition works.
Sea moss can contain iodine, fiber, minerals, and other compounds, and the exact amounts can vary depending on the seaweed itself. Adding huge scoops to every drink is not necessary and may create digestive problems or excessive iodine intake for some people.
Starting small and using sea moss as one part of a varied diet makes far more sense than treating it like a miracle supplement.
You do not have to prove your commitment to wellness by eating half the jar.
Sometimes one spoonful in a smoothie is plenty.
Conclusion: A Simple Addition to the Morning Routine

Sea moss is one of those things that can sound far more complicated than it actually is. Between the mineral claims, the soaking debates, the water debates, the blending ratios, and the endless opinions online, it is easy to feel like there must be some secret method you are supposed to get exactly right.
There really is not.
At its core, making sea moss gel is simply about cleaning the moss well, allowing it enough time to fully hydrate, blending it with the right amount of water, and storing it properly. Once you understand those few steps, the process becomes surprisingly simple.
I also think sea moss is much easier to appreciate when you stop expecting it to perform miracles.
It does not need to completely transform your health overnight to be worthwhile. It can simply be another whole-food ingredient you choose to add to your routine because you enjoy it and because it works well with the foods you are already eating.
For me, that means adding it to a morning smoothie with fruit and greens. It blends right in, does not require much effort, and gives me another easy way to add variety to what I’m already doing.
And that is really the part I enjoy the most.
Wellness does not always have to mean dramatic cleanses, expensive supplements, complicated routines, or chasing the newest thing that promises to fix everything. Sometimes it looks much quieter that that. Sometimes it is just learning how to prepare something new, keeping a jar of it in the refrigerator, and adding a spoonful to your breakfast.
Sea moss may have come from the ocean, but it does not need to become and entire lifestyle.
Clean it well. Soak it, Blend it. Keep it cold. Add it to something delicious. And then carry on with your day.


Leave a Reply